Thursday, October 18, 2012

Recipe: Broccoli Cheddar Soup

Is soup "badass?" It is when I do it!

Just like at Panera, but without the egregious price tag

INGREDIENTS
  • 1 onion, chopped fine
  • 5 Tbs butter
  • 1/3 cup flour
  • 2 cups half & half
  • 3+ cups chicken broth/stock
  • 1 lb fresh broccoli
  • 2 carrots, grated (~1 cup finished)
  • 8 oz sharp cheddar cheese, grated
  • Salt & pepper

INSTRUCTIONS
  1. Prep the veggies
    • Cut the broccoli florets into bite-sized pieces. Cut the stem into small pieces (no sense wasting all that broccoli - use the damn stem like your impoverished ancestors). Set broccoli aside.
    • Grate the carrots. You're looking for ~1 cup of finished grated carrot. Set aside
    • Mince the onion. The goal is small onion pieces that will disappear into a soup - not big-ass onion chunks that can be seen from space
  2. Cook the onion in 1 Tbs of butter. Sweat those onions; cook over medium heat for ~10 minutes until tender
  3. Add remaining 4 Tbs butter and allow to melt. Add flour and mix together with butter and onion. Stir the flour into the butter and make a roux. Stir flour, butter, and onion for ~3 minutes.
  4. Add 3 cups chicken broth and 2 cups half & half and stir. The mixture will thicken as the liquids heat. Stir until the mixture is heated through. If it feels a little too thick add more half & half or chicken broth or both.
  5. Add broccoli to the pot and simmer for ~15-20 minutes - this will cook the broccoli. Check the doneness of the broccoli. When tender, add the carrots. Cook for 30 seconds.
  6. Buzz/blend
    • If you have a hand-held stick blender, buzz your soup into silky submission. Actually, leave a few chunks in there for rustic appeal, but process most of the soup.
    • If you have a blender, carefully pour your soup into the blender (should be done in batches to prevent painting the kitchen with hot soup) and blend a little. Like the stick blender method, leave some chunks for rustic authenticity. Return soup to the pot.
  7. Add cheese, stir, and cook for 5 minutes. Check salt & pepper - add necessary seasonings
  8. Done

FAQs
  • It seems there are a lot of soups on this site, what gives? >> Mmm, soup is easy to eat.

Monday, April 30, 2012

Recipe: Badass Beef Sandwich


This started as a neat idea and ended as a religious experience*. Try this beef sandwich, and your world view probably will be altered.
* Offer does not apply to Hindus and vegetarians.

See the layers: the Gorgonzola top, the beefy middle, the oniony bottom, and the crispy/buttery roll. I think I'm going to cry... again. Notice the salad (added for health reasons)


INGREDIENTS
  • Heat 'n eat sliced beef (like, 2+ lbs?)*
  • 4 oz. Gorgonzola cheese
  • 1/2 Cup Sour Cream
  • 4 Medium Onions, cut into 1/4" half-rings
  • Salt & pepper
  • 1 Tablespoon Red Wine Vinegar
  • Chicken Stock
  • 1.5 teaspoons Sugar
  • Italian Sandwich rolls
  • Butter

INSTRUCTIONS
Onions 
Cooked onions will eventually become this color.
This means they are sweet and delicious.
  1. Cut the onions in half (pole to pole) and then slice into 1/4" half-rings
  2. In a medium saucepan, over medium heat, cook the onions in ~3 Tablespoons butter and 1 teaspoon salt until beginning to brown (~10 minutes)
  3. Deglaze the pan with ~1/2 cup chicken stock. This will get the browned pieces of onion off the bottom of the saucepan AND chicken stock tastes good.
  4. Continue to cook the onions until they get browner and more delicious (~20 more minutes)
  5. Add ~1 Tablespoon vinegar and 1.5 teaspoons of sugar and stir to combine - cook for another 5-10 minutes.
  6. Done. evacuate the onions from the pot (try a bowl, genius) and save for sandwich construction. Be sure to taste those onions - delicious, no?
Gorgonzola Spread

  1. Pour the blue cheese into a bowl
  2. Top with sour cream
  3. Mash and stir: the goal is to make the cheese and sour cream into one glorious paste of deliciousness
  4. Done. Save the spread until later.
Rolls
  1. Cut the rolls in-half the long way (think hero sandwich, yo)
  2. Spread the rolls with butter
  3. Put the rolls, butter-side-down, on a hot griddle and cook. The goal is to add some buttery crunch to that bread. You may need to press-down on the rolls to get them to brown (see the mason jar in the pic)
  4. Done, prepare to make sandwiches
Meat
  1. You bought heat 'n eat meat for a reason: ease of preparation.
  2. Heat yo meat, follow the instructions on the package. Usually it means heat until hot, but don't boil. Why no boil? Boiling will toughen your tender meat.
  3. When done, turn-off the stove and get ready for admission to beefy heaven.
Assembly
  1. Open your buttery Italian roll
  2. On the bottom, spread some onion jam - OMIGOD, it's already awesome!
  3. Top with meat - add some juice, I will allow it
  4. Spread Gorgonzola spread on the other roll
  5. Top your meat with the cheesy roll
  6. Eat. Be sure to sit down - it's that good.
  7. You're welcome.
Sandwich assembly station
Efficiency is badass!

FAQs
  • Why not homemade Italian beef? >> That's a whole other recipe. Instead, I rely on my excellently sourced food purveyors here in the greater Chicagoland area. We have the finest foodstuffs the world has to offer, and they're all at my fingertips.
Vienna Beef. Excellent. Get some.
  • No hot peppers? >> I made this last night and added hot giardinera. It was good, but a little too much for this sandwich. For a spicy beef sandwich, just do the beef, hot giardinera, and Provolone cheese. Baptize that sandwich in the au jus - a delicious Italian beef.

Badass Music to Cook By

Hey, fat kid, do yourself a favor: next time you're cooking, blast the stereo to something that will piss-off the neighbors:

Clutch

It's badass. Need a hint? Check-out Red Horse Rainbow

Tuesday, April 3, 2012

Recipe: Shrimp 'n Grits


Famous lowcountry fare, but I’m from Chicago – what up?

Shrimp 'n grits - green beans optional

INGREDIENTS
  • 1 1/2 Cups grits (I like ‘em yellow)
  • 2 Cups heavy cream
  • 2+ Cups chicken stock/broth
  • 1 tsp Old Bay seasoning
  • 8 oz cheese*, shredded
  • 1 lb raw shrimp (31-40), peeled and deveined (31-40 means there are 31-40 shrimp per pound - your fishmonger knows all about this...)
  • 1/3 Cup green onions, sliced on the bias (that means diagonally)
  • 1/4 Cup red bell pepper, brunoised*
  • 1 15 oz. can Diced tomato
  • 1 stick (4 oz.) butter, cut-up into pieces
  • Hot sauce
  • Salt & pepper
INSTRUCTIONS
Grits
  1. In a large stockpot, pour-in the chicken stock/broth and Old Bay seasoning and bring to a simmer. Add grits and heavy cream and whisk to combine. Cook until the liquid is absorbed and the grits have lost their graininess. If you use fine textured cornmeal, this will take a few seconds and you’ll be like, “WTF!?” If these are slow cooking grits, this will take 15-20 minutes.
  2. When grits are complete, drop the heat, add the cheese, and stir to combine. Set aside.
Shrimp
  1. In a nonstick sauté pan over medium high heat, add 2 tsp canola oil. Add the shrimp in one layer and cook for ~4 minutes, or until pink. Flip the shrimp, add the tomatoes, peppers, and green onions and cook for ~3 more minutes.
  2. Turn-off the heat, add the butter and allow to melt. Add hot sauce to taste (oooo-e! that’s some spicy!). Stir to combine as one glorious topping.
  3. Serve it up! Enjoy with some sweet tea, moonshine, or other southern drink.
HOW TO EAT
  • Plop-down some grits on a plate and top with a generous spoonful of the shrimp. Be sure to get a lot of that buttery liquid: oh, that’s the stuff!
RECIPE NOTES
  • Cheese? Why is there an asterisk next to the cheese? >> There are a lot of cheeses that will fit the bill here: sharp cheddar, mild cheddar, Havarti, etc. When I last made this, I use Havarti, and it was excellent. Any kind of cheesiness will be good – go with what you like.
  • Seriously, brunoised? WTF? >> That’s a fancy French word for diced small and uniform. The red pepper dice needs to be small to ensure that the pieces cook quickly and look pretty. Pretty food is badass? Sure.
  • A note on peeling and deveining shrimp >> Being from Chicago, there are no indigenous shrimp in my history – I had to learn like any of you people. It’s simple, really: 1. peel the shrimp (just rip-off the peel and tail – there’s no trick here), 2. with a sharp (and I mean SHARP) knife, insert gingerly into the concave portion of the shrimp (it’s belly, as it were) and cut the entire length, 3. While rinsing under cold water, free the vein and rinse it down the drain, and then 4. Drop your cleaned shrimp into a bowl of cold water. See? Easy.

Saturday, February 18, 2012

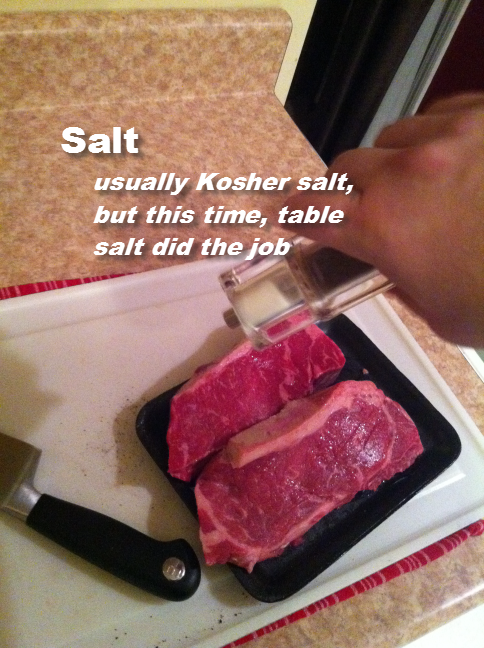
Recipe: Badass Steak!

I can't believe it's taken this long, but we finally have STEAK!


Now, there are a lot of ways to make a steak, and most of them are correct (meaning that you really have to fuck things up royal to make a steak taste bad), but I have the BEST WAY TO COOK A GODDAMN STEAK RIGHT HERE!

INGREDIENTS
  • Steak(s)
  • Salt
  • Pepper
  • Canola oil
INSTRUCTIONS
  1. Pre-heat your oven to 500 degrees (that's right, 500 motherfucking degrees!), which will take 15-30 minutes
  1. Remove the steak(s) from the fridge, liberally salt & pepper, and rub with oil. Allow to rest until I tell you otherwise.


  1. When the oven has reached 500, and been there for 5-10 minutes, throw your cast iron skillet into the oven for 5 minutes - you want to get that thing red-fucking-hot!
  2. After 5 minutes, crank a burner to high heat, remove the skillet from the oven (use a mitt or gloves) and put it on the burner, then place the steak(s) into the skillet - witness the sizzle, which is good!
  1. DON'T FUCKING TOUCH, for 3 minutes.
  2. Flip and cook the other side(s) for 3 more minutes
  1. Put in the 500 degree oven for 3 minutes
  2. Open the oven, flip the steak(s), and cook for another 3 minutes
  1. Remove, evacuate to a strategically placed cutting board, tent with foil, and rest for 3 minutes
  1. Cut on the bias and serve to your special lady friend
Serving Suggestion
  • Serve with badass mashed potatoes and a vegetable (we used frozen corn tonight)

FAQs
  • Why a cast-iron skillet? >> Because you can heat that thing on the sun and not have to worry about warping or melting Teflon or any of that bullshit. Plus cowboys used to cook on it, so it's totally badass!
  • Seems too easy - what about Bearnaise, Au Poivre, or other fancier finishes? >> Fuck off, this is badass.

Purchase: Food Processor

Hello Friends,

I just placed an order for this bad ass food processor:


Cuisinart DFP-14 14-Cup Food Processor. Look-out, tiny pieces of shredded vegetables will soon be flying out of my kitchen (delivery by 2/24 according to Amazon)

Friday, February 10, 2012

Recipe: Lasagna

Damn, this is some good-ass lasagna.  All that’s missing is the trip to little Italy and the unwelcome groping of your wife/girlfriend.

Lasagna on the plate - it's beautiful

INGREDIENTS
Sauce
  • 1 Tbs olive oil
  • 1 medium onion, finely diced
  • 4 oz mushrooms, sliced
  • 6 medium garlic cloves, minced
  • 1/2 lb ground beef (80% lean)
  • 1/2 lb mild Italian sausage
  • 1/2 tsp salt
  • 1/2 tsp black pepper
  • 1/2 Cup heavy cream
  • 1 can (28 oz) diced tomatoes
  • 1 can (28 oz) crushed tomatoes
Other ingredients
  • 15 oz tub ricotta cheese
  • 1 1/4 Cup Parmesan cheese, grated
  • 1/2 Cup fresh basil, chopped
  • 1 egg, beaten
  • 1/2 tsp salt
  • 1/2 tsp black pepper
  • 12 no-boil lasagna noodles << IMPORTANT! Use the no-boil noodles
  • 16 oz mozzarella cheese, shredded
  • 1/2 Cup heavy cream

INSTRUCTIONS
Sauce 
  1. In a large Dutch oven, heat the olive oil until shimmering (2 mins).  Add onion and mushroom and saute until onion is softened (4 mins).  Add garlic and cook until fragrant (30 seconds).
  2. Add meats and cook until no pink remains (4 mins), BUT NO FURTHER!  I’ll explain later.  Be sure to break-apart the meat into tiny pieces – this will help the texture later.
  3. Add 1/2 Cup cream and simmer for 5 minutes.  This will remove some of the liquid, and leave the fat and the flavor.
  4. Add canned tomato products, salt, and pepper and simmer for 10 minutes.
  5. Kill the heat, the sauce is complete.  You can now safely refrigerate the sauce for later (it’ll keep for up to 2 days without getting nasty).  Be sure to re-heat the sauce before using again.
Assembly
  1. Mix ricotta cheese, 1 cup of Parmesan cheese, egg, 1/2 Cup cream, basil, salt, and pepper until well-combined.
  2. Ladle ~1/4 cup of the sauce on the bottom of a 9x13” baking dish.  Lay-down three lasagna noodles.  Top with 3 Tbs of ricotta mixture per noodle (9 Tbs total per layer).  Spread-out the cheese to evenly cover the noodles.  Top with 1 1/2 cups of sauce.  Sprinkle-on 1 Cup of the mozzarella cheese.  Lay-down three more noodles, 9 more Tbs ricotta, 1 1/2 cups more sauce, and 1 cup of mozzarella.  Do it again – that’s three layers.  For the final layer... 
  3. Top the final layer with the last three lasagna noodles.  Top with the remaining sauce, and sprinkle-on the remaining mozzarella cheese.  Sprinkle-on the remaining 1/4 cup of parmesan cheese (you know, the cheese you DIDN’T use for the ricotta mixture).
  4. Preheat your oven to 375 degrees.
  5. Cover with foil that has been sprayed with non-stick cooking spray (to prevent the cheese coming-up with the tin foil), and bake for 15 minutes.  Remove the foil and bake for another 25 minutes, or until the cheese is slightly browned.
  6. Let cool for a minute or two, and cut and eat.  This will easily make 12 good-sized chunks (for the ladies), or 6 monster-sized chunks (for the gentlemen).  It took 1.5 pans of lasagna to feed eight large adults and four small children, but we were all stuffed royally afterwards.

RECIPE NOTES
  • Beef and Italian sausage? >> Yeah.  Lots of Italian recipes call for “meatloaf mix” when they’re specifying ground meats.  Meatloaf mix is 1/3 ground beef, 1/3 ground pork, and 1/3 ground veal.  To me, that’s a major pain in the ass.  You can sub-in the Italian sausage (ground pork) and get some extra flavors as well.  Be sure to buy loose sausage from the butcher, or cut the sausage out of the link casings – don’t just throw-in some Italian sausage links and think it’s going to work.
  • What’s with the heavy cream? >> The classic Bolognese sauce uses milk/cream, and they really knew their business.  It almost acts as a panade and keeps the meat moist and delicious. In the ricotta cheese, the cream keeps things moving - otherwise the cheese tends to be a little sticky.
  • Cook until no pink remains and no further, WTF? >> Many times you want to “brown” the meat, which makes a flavorful crust.  If this was a long-cooking stew, I’d say go for it, but it’s not – this is a quick-cooking lasagna.  We want to make sure the meats are cooked, but still want them to be tender.  It’s all part of the master plan.
  • What's with the no-boil noodles? That's not how grandma makes it >> There are two reasons: first, no-boil noodles are easier. Second, they are more consistent. If you've ever tried to make lasagna from regular noodles, you burn your hands on the hot pasta, rip a few, and then end-up with not enough to make a perfect dish. The no-boil work right every time. Do as I say.
  • There aren’t a lot of spices, is this right? >> That’s what I thought too, but it works.  Turns-out you don’t need a lot of spices for this lasagna – it’s awesomely fantastic without them.  Also, the Italian sausage adds the right amount of backbone so you don’t need extra. Also, asking questions is not bad ass.
Here's how it looks out of the oven. A work of art, no?